Search This Blog

Where is TIDES INN Today?

Click here map link
The last position reports for Tides Inn will be displayed on the map. (Courtesy of www.winlink.org) Tides Inn homeport is Dare Marina, Yorktown VA

Working Down the Task List

     Its been raining again and rain forecasted for next two days, so the final coat of Cetol will have to wait until Wednesday. The boat is looking pretty good with 3 coats applied so far.

     With the teak work almost done, its time to turn to other tasks on the list. Replacing the radar will be a major task. I bought a new digital chartplotter before heading to Brussels in 2016, and subsequently learned that I have to install a digital radar to be compatible with the new chartplotter. The new radar requires its own power source, so I have to install a new breaker and wiring. I also have to continue troubleshooting why I am getting electrical interference with the chartplotter. I installed a voltage stabilizer but that did not resolve the issue. Running a new power line for the chartplotter and radar may be the answer.  Meanwhile, I got the old radar dome off and at same time replaced the horn and cleaned up the foghorn PA speaker.
   
A quick fix was repairing the WiFi antenna. The fiberglass antenna housing had broken off the mount. Some 5200 polyurethane and a clamp fixed it right up.

        On the mainsail furler, I needed to replace the rubber washers that support the furling mechanism. Once I found the one single provider that sells the replacement washers and bought a set (for 22$ plus 14$ shipping), the replacement was fairly straight forward. Or, would have been if I had kept the furler lined up correctly. Took an extra 30mins to get it back lined up with the screw holes, but the whole task took less than 1hr.

     A much more exasperating task was replacing the propane locker latch. Should have taken 15mins, but took couple hours and couple trips to the garage to grind down parts to fit and cannibalize some parts from the old latch to make it work. The new latch is designed differently than the old one (16yrs old), so had to make some modifications. Here's the old latch - all corroded and doesnt turn.
      Here's the new latch, with the old catch installed and center stud ground down to fit. (The new catch cam was way too large). Will need to keep it this latch lubricated to keep it working properly. It is not made of stainless - not good.

     The other project underway is to replace the companionway slides. I guess the sun and freezing temperatures crack the slides along the mounting screws. I have cut out the old slides and am shaping the replacement slides.

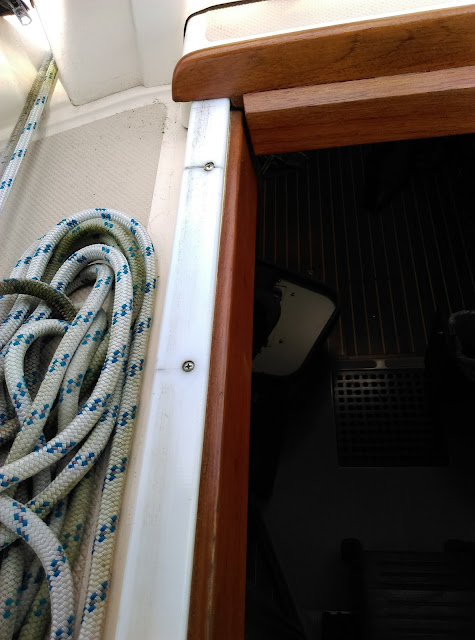
I cut off the old slides, at 45 degree angle, with a vibrator cutting tool. The new slides will scarf right into the angled cut. Will have photos of the finished, new slides tomorrow.


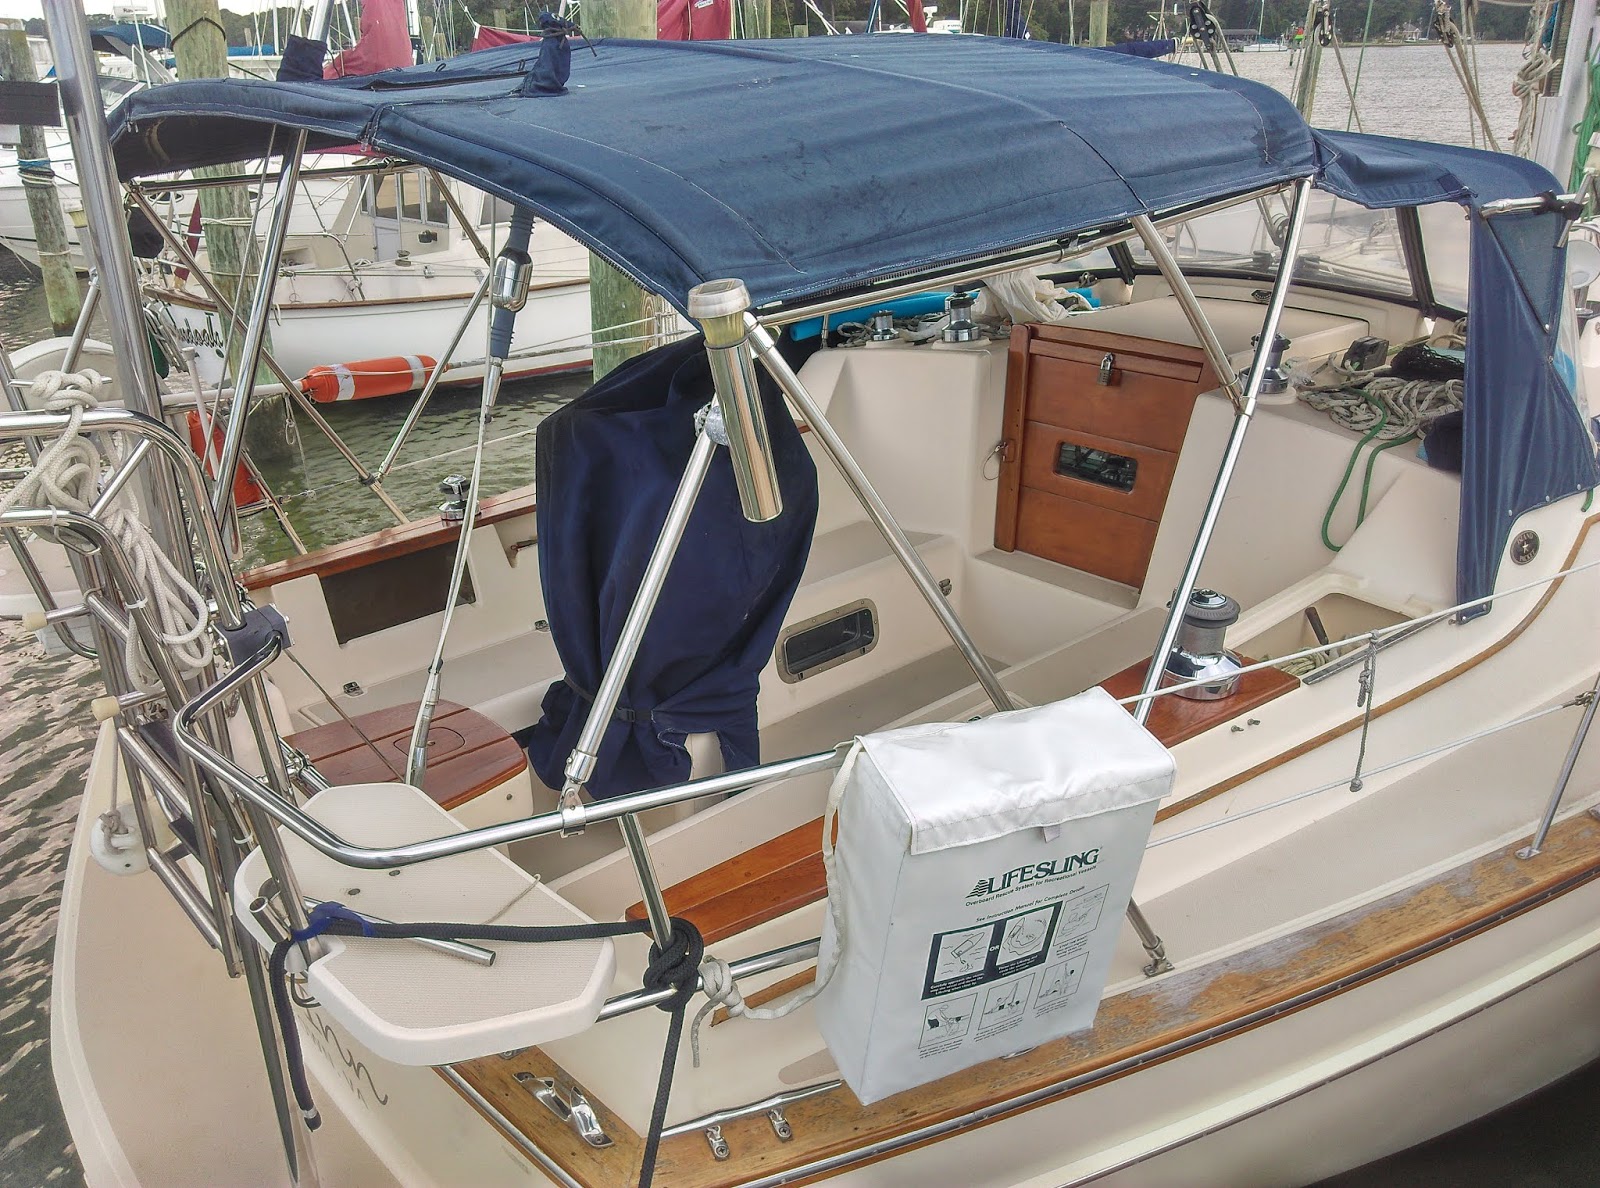
   Still more tasks to go, but making steady progress. Still have the wind generator to mount and sails and new furling lines to install, and refrigerator to address. And finally to compound down the deck and cabin sides and treat with "Woody Wax". The boat will sparkle then.


Water Tank Cleaning

     Teak refinishing is almost done, I put the 3rd coat of Cetol on gunnales today. One more to go, which may have to wait until Wednesday, looking at weather forecasts. Next project on the list is to clean out the water tank.  We removed the tank gauge which provides a 2inch hole into the tank. Here we are sucking out the small amount of water still in the tank (been sitting for 2 years).

     Even though we always filter our water through a house filter when filling the tank, we still get deposits (apparently calcium precipitate) that accumulate on the bottom of the tank. Here's a look at our deposits after 15yrs of use - this is the first time we have removed the gauge and looked inside. If you enlarge the  photo and look closely you will see the pile of deposits along the center line of the tank. There is a slight "v" in the tank bottom so the deposits settle in the middle. 

     I used a shop wet/dry vac to suck the deposits out. I also taped a putty knife to a copper pipe to reach down in and scrape the deposits to a spot directly under the hole so I could get to them with the vacuum. It worked pretty good. Couldn't get it perfectly clean, but did good enough.

     Here's a photo of the water gauge. It had a layer of calcium deposits on it that were preventing the float from freely rising and falling. I scaped and sanded it with wet/dry sand paper and now it is ready to reinstall. Should work perfectly now. 


     All put back together and ready to fill.  I still need to run bleach through the hoses. Alga and bacteria grow in the plastic hoses over time and we need to run bleach through the hoses every few months. The T-fitting valve you can see allows me to suck bleach from a bucket into the hoses without having to put the bleach into the main water tank - not good for the aluminum tank.  The filter you can see collects the calcium crystals from the tank before they can move on to the pump and jam it up. Easier to clean the filter here than have to clean out the pump. I have water freshener/cleaner also that I will need to run through the hot water tank to clean out the small amount of water that has been sitting in the hot water tank for the last couple years.


Misc non-varnish jobs during rains

     Its been raining for 5 days straight and one more day to go according to forecast. So, no applying any new Cetol coats. I will now have to roughen up the surface with fine sandpaper before putting on the next coat as the Cetol has been drying for days. Meanwhile I have been working on other tasks from the to do list. One project checked off was cleaning up the propane locker and replacing the 15yr old hose, regulator and pressure gauge. The old gauge had gotten moisture in it. I will also install a new latch on the locker top as the old one is corroded and sticks.


First Coat of Varnish

   Got the first coat of varnish (Cetol) on today - perfect day for varnishing with low humidity. Tomorrow the rain is supposed to start.  We'll see if I can get another coat on between showers? Perhaps a few days to work on inside projects.
  Here's a before and after photo, with boat all taped up and ready for varnishing.


Varnishing (actually CETOL)

   Finally finished all the stripping and sanding, time to move to applying the 4 coats of Cetol. I use the "Natural Teak" version which provides the closest appearance to real varnish (but lasts twice as long because of the UV filter protectors contained). It does turn darker after a couple years in the sun, but not nearly as dark as the original Cetol which turns a fairly muddy brown color that most purest dont like.  I dont use the gloss topcoat that is available so the end result is a matte type appearance. You can see I've started at the bow which has 3 coats so far.


   Taped off the "eyebrows", that strip of teak above the portholes, and gave them their first coat today. I will do the first coat on the gunnales tomorrow and 2nd coat on eyebrows - before the rains come on Saturday. Need to get the sanded teak covered with at least one coat before it rains or else I will have to sand them again to remove the water stains. 

   I'm hoping to get the teak work done by next week, although I have to have 3 more days of rain free afternoons, and the forecast is for rain each day next week.  Now that I am through stripping and sanding and will have at least one coat of Cetol applied, I can start scrubbing the deck. The teak dust leaves a stain on the fiberglass that can only be removed with rubbing compound. But the deck needs compounding anyways to remove the sun oxidation, which is why I waited until all the sanding is done to attack the decks. Once it is all cleaned and shiny, I'll apply Woody Wax which provides a protective polymer coating. 
   Then it is on to the fresh water tank and refrigeration - and we might be ready for some sailing by the end of the month!

Major Teak Refurbishing Underway

   Baking in the summer sun and freezing in the winter for 2 years took its toll on Tides Inn's teak. I have to strip down the whole boat, bleach out the black spots and sand down the weathered areas.  We did the outside of the gunnales in the boatyard and I was able to take the companionway boards and hatch covers home to work on. But the gunnale tops and cockpit have to be done in the bright sun and 90 degree weather. 


   I've finished stripping the whole boat. Now need to bleach and sand. Today was a day off as its supposed to rain, so I worked on getting the chart plotter to operate correctly - all is working now that I plugged the NMEA cable into the proper socket (labeled video instead of the network socket I had used).  Its a bit of magic that the VHF radio AIS targets show up properly on the chartplotter.  Also, confirmed that the air conditioning is working - pumping water and blowing cold air as its supposed to. I imagine it might need recharging after 15 years of use.  The refrigerator also works at least enough to start cooling the evaporator. I'm sure it needs recharging. The fresh water tank is near empty and will need cleaning and the hoses bleached out but, at least the pump is working properly. 


     While stripping the sides, I was able to finish off the cockpit teak.  I also got the bow section sanded and cleaned up and two coats of Cetol on before the rains came today. The sides can get rained on since I havent bleached and sanded them yet.


     Still a lot of work to do on the gunnales, but starting to see progress. It will look very nice in a week or so and I can keep it maintained in the future. Next big cosmetic project is to clean and treat the deck with some magical Woody Wax. 

Teak and Winches

   Back at Dare Marina and plugging away on the work list. The teak work is going to take a couple weeks and, there are other projects to do while the teak is drying.


First up were the cockpit winches. Removing the covers also let me sand the teak right up to the mounting plate. There are 9 winches in all on Tides Inn. With the 90 degree weather and high humidity, I took 3 days to overhaul all 9. No problems noted with the winch conditions but they all definitely needed some fresh grease.


   I finished the first coat of Cetol on the cockpit teak under sunny skies, then 30 minutes later the rain came. Fortunately, that was enough time for the Cetol to dry enough to protect itself in the 90 degree heat. Today, I was able to lightly sand the surface with fine sandpaper, removing the water spots, and then apply a second coat. No rain forecasted for today.  I should be able to get two more coats on in the next two days. Meanwhile I can start stripping the gunnales starting in the bow.


   There are 3 winches on the mast. The teak mounting blocks were looking pretty weathered and green after sitting for years unattended. I was able to sand the mold off and apply some new teak oil. I dont bother putting Cetol on these blocks, just teak oil.


   All finished with today's project. Tomorrow's task is to figure out why no AIS contacts are showing up on the chartplotter. I suspect corrosion on the wires from the radio to the plotter. I still have the wind generator and new radar to mount.

Afloat and Back to Dare Marina

   We're finally back in the water and back to our home marina at Dare Marina.  The 3hr transit went uneventfully, the best kind. Engine ran smoothly with no problems. New packing gland ran a little warm but not bad. I will loosen it up a little.

   We launched the boat on Wednesday and spent the day running the engine and checking alignment, which needed to be adjusted. Thursday we transited back to Dare Marina.

   Here is an unusual view of the keel of an Island Packet. The keel is designed to be a "lifting body" shaped just like the wing of an airplane. The lift generated by the keel is what enables the boat to sail slightly upwind, up to about 45degrees with efficiency for an Island Packet. Other sailboat types use different keel designs, but most require a much deeper keel to generate the same amount of lift. Our 38ft boat has a  keel that is 4ft 9in deep, quite shallow for a cruising sailboat. Inside that keel is the 9000lbs of ballast, fully protected by a thick layer of fiberglass. No keelbolts on an Island Packet.


   Note how the keel tapers to only a couple inches wide at the stern. That aerodynamic shape is what gives it the "lifting body" result.


   It was a hot day with the wind astern for the first half of the run, then we were able to turn into the wind and generate a breeze. The crew did a great job (although not much to do on a pure motoring run). We saw two sets of dolphins along the transit. They came over to see us but didn't stay to play. Too focused on eating I suppose.


   Now its time to tackle all the above the waterline tasks. Buffing up the deck, redoing the teak, new running rigging and other jobs.  Eventually we need new canvas for the dodger and bimini and enclosure.  I still need to check the refrigeration and air conditioning. All the other electrical systems appeared to be working properly.
  Its 4th of July week and temperature in the 90s. Typical for July and seems to always be the time I am working on the boat.